Technical Notes
I have been asked by a number of visitors to my website as to how I go about preparing my images so I thought that it may be useful to go through some of the methods that I use. Firstly, a list of the primary hardware.....
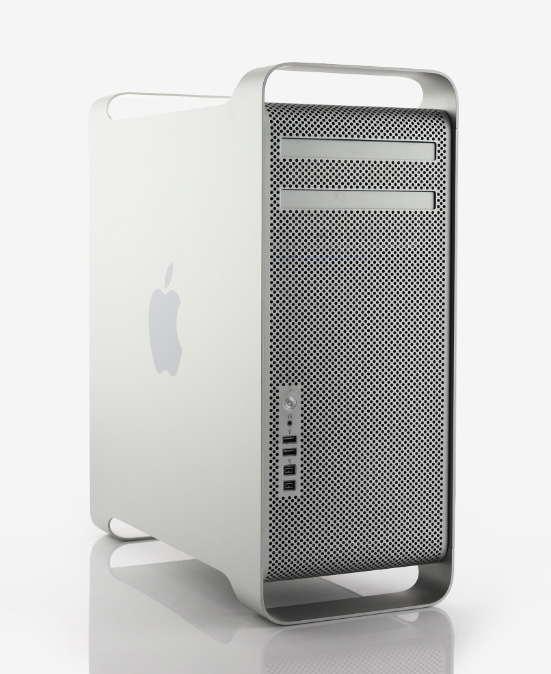
- Mac Pro (Early 2008) model, it’s old!
- Apple 27inch LED cinema display
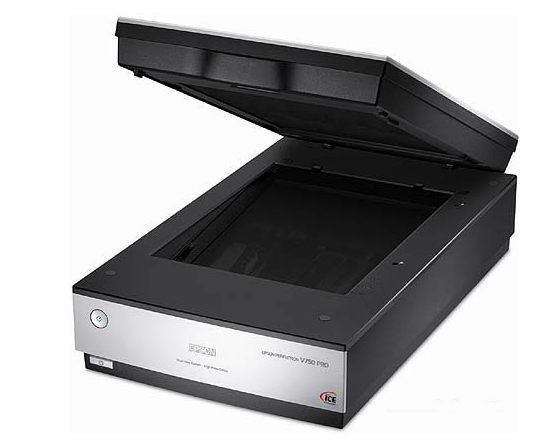
- Epson Perfection V700 flatbed scanner
The process that I have adopted when it comes to the preparation of my images for archiving is a fairly labour intensive one and one that I have developed and refined over time. However, I am determined that I preserve my images for myself saved on the hard drives of my computer and when uploaded for all to view on the internet to the very best standards I can. I have always used Mac computers from my earliest bondi blue iMac back in 1998. I can thoroughly recommend their hardware that gives very few problems, testament to the fact that I am currently using a Power Mac that is now over ten years old and counting. The only failures on this machine has been the graphics card and this was a third party item!
I use a big screen to work with my images, currently a superb Apple 27inch LED cinema display. I store my images on a high capacity hard drive that backs up every night to an external hard drive using firewire. Once a month, I physically connect another hard drive from storage safely outside of the house and back up again. Thus, in the event a hard drive failure or loss, an all too common occurrence, I have a fighting chance of getting up and running again with minimal loss of data. I use a great piece of software for my backups from the tech. developers Shirt Pocket, a piece of software called SuperDuper! I am aware that there are free backup software downloads available and that Apple provide their own in the form of Time Machine, but I like the interface of SuperDuper! And how it works seamlessly in the background.

For the physical scanning of my slides and negatives, I use an Epson V700 flatbed scanner. For a number of years, I persevered with a Konica dedicated slide scanner but I found, after some considerable research, that the Epson flatbed actually did a far better job. The main problem with the Konica was the scanning of blacks, dark blues and shadows. These areas scanned very poorly with absolutely no detail and a lot of digital noise. Add to this that the Konica had a propensity to underexpose anyway meant that many images were impossible to use even with heavy use of Photoshop. Since using the Epson scanner I have started to re-visit previously scanned images for a second time and am enjoying far better results. In fact, so good is the Epson that I am actually able to successfully scan slides and negatives that were confined to the rejects box when the films were processed many, many years ago!
Without Photoshop CS the preparation of my images would be all but impossible. This industry-leading software really is the best, I have tried many others and every time I return to Adobe’s product. By software standards, I am using a pretty old version that, despite its advanced years, still does what I require of it and thus I see no reason to update to a newer and very expensive version! I take all my photographs as RAW images. RAW means that the actual state that the photograph was taken in is always preserved and never changes, however many times it is saved or altered later. I do not quite understand why photographers, with all the technology and equipment available to them, persist in saving their images as JPGS. The format is very destructive with constant loss of data and therefore quality every time they are altered or saved. However, using my older version of Photoshop does require a bit of a workaround due to my newer camera’s RAW format not being compatible. Adobe provides free downloadable RAW converters on their website called DNG (Digital Negative) convertors. All this means is that when I upload images to the computer I do it via the DNG software that takes a few minutes. I manage all my images via Photoshop’s excellent Bridge software that is packaged with Photoshop CS. It makes organising and the labelling very easy. All images on the computer’s drives are saved as TIFFs as, again, it is as non-destructive and as efficient as possible with regard to storage space.
When an image is being prepared for the computer I use a tried and tested method making the best use of Photoshop’s capabilities; the best one being its layer function. I always describe it as being like those old tracing paper layer pictures that we used to do at school or watched being done on Vision On! Listed below is the method that I use to prepare my images for saving on the computer…..
- Stage one - Getting things straight and level
The image is opened as the background layer. Then another one is opened up above it. I then straighten everything up. Thus, I rotate and straighten the image. I also straighten out any converging verticals and any horizontals or verticals that have curves in them caused by poor lens design; all of my Canon lenses suffer from this to a more or lesser extent. I then merge these two initial layers and spend some time deciding if and how I want to crop the image. This is probably the most important early stage as it can correct and will establish the final composition. Once I am happy, I use the same aspect ratio as I started out with thus maintaining the original file size. As I use full-frame cameras, my aspect ratio is the same as 35mm negatives and slides.
- Stage two - Dealing with the sky
The first thing that I consider is the sky. A poorly exposed sky makes or breaks an image so getting it right is important. It never ceases to surprise me how digital cameras make a mess of getting the sky right by altering the colour temperature of it. Sometimes, all that is needed is to darken the whole image down or lighten it up accordingly as the rest of the image can be adjusted afterwards. Most often though, I use the select tool to capture all of the sky, feather it, copy it and go to layer → New → Layer via copy. Then I can work away at the sky layer to my heart's content without affecting any other part of the image. However, the selection of all of the sky can take quite some time to complete successfully especially if there are things like electrification masts or trees with gaps through blocking parts of it. The select → similar tool in Photoshop is good at assisting with this process but ultimately some time consuming manual fettling is required. I look for any blue and ensure that is correctly exposed and the right shade of blue. If it is a blue sky with cloud I will check that the white and greys are correctly exposed with just the right amount of detail without being burnt out. With grey skies, they often take on a slightly red hue so I will often desaturate them a little. I must admit, that I spend proportionally much longer working on the sky layer than any other part of the image, but as I said at the beginning, it is so important to get right.
- Stage three - The rest of the exposure
After getting the sky right, I open a new layer from the background and work on the rest of the image starting off using the level tool. I rarely use Photoshop's auto levels, contrast and colour tools, they do not always do a good job. I like to work on the colour balance using the slider adjustments. I know that many people recommend using the curves function but I have never been able to use very successfully. After getting the general exposure and colour correct, I look for details, particularly in the shadows and darker areas and tinker with those. I usually use the lighten shadow function using the sliders to get the details out. I often see images that have been over-done with the shadow adjust and they look very false, it’s a great Photoshop tool, as is its alter ego, darken highlights, but both need a great deal of practice and care in use. If there is a particular part of the image that requires special attention I will make an approximate selection and feather it as appropriate. Again, I will then copy → Layer → New → Layer via copy again. I can then work on this tricky layer with impunity knowing that the image that I have been working on so far remains unaffected. The final adjustment that I make is to the saturation. I may just increase or decrease the saturatation of the whole image or individual layers within it. More often or not, I will select a particular colour that needs tweaking, particular things that often need attention are yellows and greens.
- Stage four - Making it sharp
I open another layer at this point and work on the sharpness. This is usually a quick stage using the unsharp mask function but it has to be used with great subtlety. Over sharpening ruins an image making look pixelated but unsharp mask tool allows fine adjustment avoiding this. If the subject itself is unsharp but the background is fine, as in the case of a moving train being a little fast for the shutter speed, I will consider dealing with that on its own. I will do an approximate selection of the the subject using the mouse and feature the edge to about 15 pixels. I will then copy and paste it as new layer. I will then use unsharp mask a bit more rigouroulsy or even use the smart sharpen tool. Once I am happy with the sharpening I will merge any of these layers together again.
- Stage five - Tidying things up
I am careful about doctoring my images but if Photoshop allows a picture to be improved by something out of one's control then I am happy to do it. An example might be a fellow photographer standing taking their picture, a piece of palisade fencing or a mast growing out of the roof of train. I may decide to remove any of these using the clone tool. It has so many different ways to be used that I could not even begin to explain its use here but suffice to say it is exploration, trial and error that will get the best from it.
- Stage six - Saving my efforts
At this stage, I save my work. Having created a file to keep the image in (everybody has their own system) I save the file in an appropriately named chronological folder, mine save as……
- My file number, starting at 1
- Train number or class
- Operator code
- Working (from RTT)
- Headcode and minutes delayed (from RTT)
- Location with six-figure Ordnance Survey grid reference if necessary
When I click save, TIFF by default, Photoshop gives a big warning about the file size as I still have all the layers open. I ignore this at this stage as there is a little more work to do yet.
- Stage seven - Noise
Digital noise is an issue that all practitioners of modern photography have encountered at some time or another being the equivalent of grain as experienced in the past on faster hallide film. It usually occurs when the capabilities of the camera are being pushed a little too far on a dark winter’s day. On scanned images it is even more of a problem but one that can be dealt with easily; at a modest cost. Photoshop does have a function where noise can be managed. However, in my version at least, it is somewhat limited and actually seems to make very little difference. After some research and a recommendation from Martin Loader owner of the Hondawanderer website, I bought Neat Image that is a Photoshop plugin once downloaded. It was not an expensive piece of software but it is worth its weight in digital gold! However, it does have an annoying little trait on my particular computer due to me working with 16bit files. Occasionally, when using Neat Image it will freeze and crash Photoshop necessitating a force quit. This involves all the efforts put into that image being lost, hence the saving process occurring at stage six. I have been in contact with Neat Image over this and they say that they are working on the problem. The latest free update from their site appears to have reduced the number of crashes down to a very low rate. I re-visit each layer to check for noise and will treat with Neat Image as appropriate. I will also select, copy and paste as a new layer if there are individual parts of the image that need treating, for example, the side of a dark WCR class 47, that always seems to need a little extra work. The use of Neat Image is a whole tale in itself, it has taken me a long time to master it and I am still learning through its myriad of settings. My only warning is that overuse of it creates a ‘plasticky’ feel to the images and will cause a loss of detail in, for example in trees and grass. So my best advice is, us it only where needed and not necessarily to the whole image.
- Stage eight - Final checking and saving, don’t forget the flatten those layers!
At this point, I take a final look round the image and do any fine adjustments and when I’m happy I flatten the whole file. This takes the image from being, sometimes up to ten layers (usually less), and a file size of possibly 300gb down to one layer and one the same size as the original image as opened. It is this that is saved and becomes the next image in the archive.
The above may seem very long-winded and you may be wondering how on earth I actually have time to get out on the lineside to take any pictures! However, in practice, a reasonably normally exposed image with no particular problems takes about three to four minutes to deal with from initial opening to final saving. The processing of the scanned images takes a bit longer but there are less of them to deal with.
A final thought, some purists out there have very pre-set ideas about digital imaging and post-processing. In the days when I was processing and printing my own halide images in the darkroom, I also employed a number of 'dodges' to improve the quality of the pictures. To me, all that I'm doing today is employing the digital version of these same dodges. And, finally, if the technology is there, embrace it and use it I say!